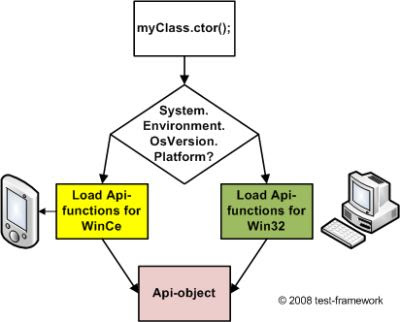
This article describes a kind of interprocess communication between a .Net-application and a native c++-application on WindowsCe/WindowsMobile-based devices.
The reason for this project was my current task, a set of native DLLs for an external hardware which should connected to the mobile device. The data structure from the DLLs is very complex and very hard to implement in a .NetCF-application, so I decided to build a native c++-application for the communication between the DLLs and .NetCF-application.
The communication between the DLLs and the c++-application was very easy, cause I got a good manual, how I could use the DLLs. It was much harder to find a way to communicate from the C++-application with the .NetCF-application.
The way, which I found, was to communicate via Windows Messages. If you want to transfer data between application with Windows Messages, you have to use the SendMessage()-function together with the WM_COPYDATA-message. Additionally, you have to use the COPYDATASTRUCT-struct from the Windows API.
In this article, I will explain it with a simple data struct, called ‘ownData’. Here is the definition of ‘ownData’ in C++.
| struct ownData { public: int ID; byte data[500]; }; |
The basic structure of the communication between both applications looks like that. Both apps have a receiver- and a sender function which handles all necessary steps.

C++
On the C++ – side its quite simple. Everything you need is nearly build-in. You just have to include some header files and everything is OK.
For a short example, it is enough to include the “windows.h”-header file.
So, I create in Visual Studio a new C++-project for embedded devices as plain Win32-C++-project. The main.cpp-file looks like that…
| #include <windows.h> int WINAPI WinMain(HINSTANCE h, HINSTANCE, LPTSTR arg, int nCmdShow) { // define a new handle for the wndclass HWND hMain = 0; // create and define a new wndclass WNDCLASS wc; ZeroMemory(&wc, sizeof(wc)); // this function handles all Windows Messages wc.lpfnWndProc = MainWndProc; wc.hInstance = h; wc.hbrBackground = (HBRUSH)(COLORWINDOW+1); wc.lpszClassName = L”SENDER”; wc.cbClsExtra = 0; wc.cbWndExtra = 0; // register new wndclass wc RegisterClass(&wc); // create a new window from wc hMain = CreateWindow(L”SENDER”, L”Sender”, WS_VISIBLE, 0, 0, CW_USEDEFAULT, CW_USEDEFAULT, NULL, NULL, h, NULL); // hide hMain ShowWindow(hMain, SW_HIDE); UpdateWindow(hMain); // creating a Message var MSG msg; // joining the message pump while (GetMessage(&msg, NULL, 0, 0)) { TranslateMessage(&msg); DispatchMessage(&msg); } // setting the return value for WinMain return msg.wParam; } |
In the MainWndProc-function, I will filter all Windows-Messages. My special interest is on the WM_COPYDATA-messages. They contains the sent data from the other application. Here is my function…
| LRESULT CALLBACK MainWndProc(HWND hwnd, UINT msg, WPARAM wParam, LPARAM lParam) { // checking msg switch (msg) { case WM_COPYDATA: { // parse the lParam-parameter in a PCOPYDATASTRUCT PCOPYDATASTRUCT pcds = (PCOPYDATASTRUCT)lParam; // parse pcds->lpData in your own data structure ownData* od = (ownData)(LPSTR)pcds->lpData; // do whatever you want // with your ownData od // exiting break; } } //at last, your should run the DefWindowProc and setting the return value return DefWindowProc(hwnd, msg, wParam, lParam); } |
So, now we have all functionality to get answers from another application. Now we need the functionality to send data to another application. I have create an own function for that. In this function, I used the FindWindow()-function from the Windows API. They normally need two parameters, a classname and a windowname. In this case, I want to find/contact a .NetCF-application.
‘Normal’ .NetCF-applications have ‘#NETCF_AGL_BASE_’ as classname and the windowtext as windowname.

In the case, I used a new class which inherits the WindowMessage-class from the ‘Microsoft.WindowsCE.Forms”-namespace. More to that aspect will follow later in this article. When I use the WindowMessage-class, you got a new entry in the the handle-list from WindowsCe or WindowsMobile. The new handle has a classname equal “#NETCF_AGL_MSG_” but no windowname. You can set the windowname manually by the classes property.

At next, I implemented a send function in my C++ application, which has a ownData-parameter. The function creates a new COPYDATASTRUCT which my own data, looks for the receiver window and sends the COPYDATASTRUCT to the window if its exists.
| static void Send(ownData data) { // create a new COPYDATASTRUCT COPYDATASTRUCT cds; // putting the data from ‘data’ in ‘cds’ cds.dwData = (WPARAM)0; cds.cbData = sizeof(ownData); cds.lpData = &data; // creating a new HWND from a running application HWND hReceiver = ::FindWindow(_T(“#NETCF_AGL_MSG_”), NULL); // checking hReceiver if (hReceiver != NULL) { // sending the cds SendMessage(hReceiver, WM_COPYDATA, (WPARAM)0, (LPARAM)&cds); } } |
.Net Compact Framework (C#)
On the receiver side, I had a managed .Net Compact Framework application which is written in C#.
At first, we need some things from the Windows API. We don’t have here in C# a build-in struct like COPADATASTRUCT, so we need to create it. It is nearly the same as in C++.
| public struct COPYDATASTRUCT { public System.Int32 dwData; public System.Int32 cbData; public System.IntPtr lpData; } |
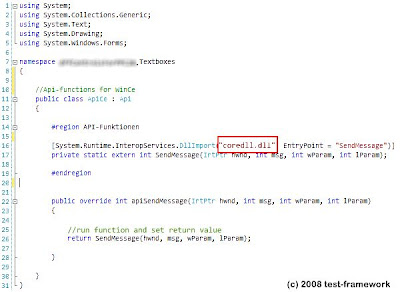
At next we need the FindWindow()-function from the Windows API. Here is the declaration that we can use it in C#.
| [System.Runtime.InteropServices.DllImport("coredll.dll")] |
Both things, COPYDATASTRUCT and FindWindow() are necessary in the application.
Here is the declaration of the ownData struct in C#. Here, it is very important that the byte-array will be declared manually with a defined size of 500 entries like in C++. If this will not be done, you will have a lot of trouble during runtime.
| public struct ownData { public System.Int32 ID; [System.Runtime.InteropServices. MarshalAs(System.Runtime.InteropServices. UnmanagedType.ByvalArray, SizeConst = 500)] public byte[] data; } |
As I said above in this article, I created a new class which inherits the WindowMessage-class from the Microsoft.WindowsCE.Forms-namespace. In this new class, I’ve the WndProc-function overwritten. With my own function, I’m able to check and handle all incoming Windows Messages.
| protected override void WndProc(ref Microsoft.WindowsCE.Forms.Message m) { // check m.Msg switch(m.Msg) { case 0x4A: // 0x4A = WM_COPYDATA // extract the own data from the Windows Message m ownData data = this.ExtractDataFromMessage(m); // do whatever you want with your data } // run base.WndProc base.WndProc(ref m); } |
In the overwriten WndProc function I call a function named ExtractDataFromMessage(). This function extract the sended data from the Windows Message into my own data struct. These function works with pointers, so I had to declare her as unsafe. I also had to enable the unsafe flag in the project properties.
| unsafe private ownData ExtractDataFromMessage(Microsoft.WindowsCE.Forms.Message msg) { // delcare all vars with are needed ownData data = new ownData(); COPYDATASTRUCT cds; System.IntPtr* targetPointer; // create cds and extract the COPYDATASTRUCT data from the Windows Message cds = (COPYDATASTRUCT)System.Runtime.InteropServices. Marshal.PtrToStructure(msg.LParam, typeof(COPYDATASTRUCT)); // get the targetPointer targetPointer = &cds.lpData; // get the data from the COPYDATASTRUCT data = (ownData)System.Runtime.InteropServices. Marshal.PtrToStructure(cds.lpDAta, typeof(ownData)); // return the data return data; } |
In the C#-application, I also have a Send-function, which encapsulate some functions. The send-functions has a ownData-parameter. In this function, I retrieve the addresspointer of ‘data’, create a new instance of COPYDATASTRUCT in my C#-application, retrieve the addresspointer of it and create a new Windows Message and send with Microsoft.WindowsCE. Forms.MessageWindow.SendMessage().
| private void Send(ownData data) { Microsoft.WindowsCE.Forms.Message msg = new Microsoft.WindowsCE.Message(); COPYDATASTRUCT cds = new COPYDATASTRUCT; // create a new pointer for ‘data’ System.IntPtr pData = System.Runtime.InteropServices. Marshal.AllocHGlobal(System.Runtime.InteropServices. Marshal.SizeOf(data)); System.Runtime.InteropServices.Marshal.StructureToPtr (data, pData, false); // setting cds cds.dwData = 0; cds.cbData = System.Runtime.InteropServices.Marshal. SizeOf(data); cds.lpDAta = pData; // create a pointer for ‘cds’ System.IntPtr pCds = System.Runtime.InteropServices.Marshal.AllocHGlobal (System.Runtime.InteropServices.Marshal.SizeOf(cds)); System.Runtime.InteropServices.Marshal.StrucutreToPtr (cds, pCds, false); // getting the server-application System.IntPtr server = FindWindow(“SENDER”, “Sender”); // checking server if(server != null) { // setting ‘msg’ msg.HWnd = server; msg.Msg = 0x4a; // 0x4a = WM_COPYDATA msg.WParam = (System.IntPtr)0; msg.LParam = pCds; // sending msg Microsoft.WindowsCE.Forms.MessageWindow.SendMessage (ref msg); // clearing the allocated memory System.Runtime.InteropServices.Marshal.FreeHGlobal(pData); System.Runtime.InteropServices.Marshal.FreeHGlobal(pCds); } } |
SendMessage(), PostMessage(), SendNotifyMessage(), etc…
The Windows API contains a lot of functions to send Windows Message from on application to another. MSDN says that you have to use the SendMessage()-function. Correct! Why? For sure, you can use PostMessage() or SendNotifyMessage() as well, your receiver-application gets the Windows Message, but the encapsulated data pointers are corrupted and all your data is lost.
Summary
Transferring data with Windows Messages is a nice method to transfer data fast from an application to an other application. You can compute the data immediately in the receiver application. It also could be a way for a .Net developer to use external hardware on mobile devices, when the drivers are very difficult to use in .Net.